Creating interactive 3-D PDF documents with VMD and Acrobat3D
 The popular Adobe PDF document format (PDF version 1.6) now supports
inclusion of 3-D geometry.
The latest versions of
Adobe Acrobat Reader
can now display, rotate, and animate 3-D models embedded within
these PDF documents. This capabilities provide a tremendous new opportunity
for creating tutorials, presentations, and electronic textbooks containing
3-D models of biomolecules that can be interactively manipulated by the
reader.
The popular Adobe PDF document format (PDF version 1.6) now supports
inclusion of 3-D geometry.
The latest versions of
Adobe Acrobat Reader
can now display, rotate, and animate 3-D models embedded within
these PDF documents. This capabilities provide a tremendous new opportunity
for creating tutorials, presentations, and electronic textbooks containing
3-D models of biomolecules that can be interactively manipulated by the
reader.
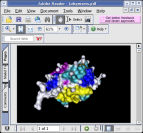
Scientific Case Study Enhanced by VMD 3-D PDF Molecular Models
This is an example of a full-length PDF document which has been enhanced by replacing individual 2-D renderings and figures with interactive 3-D molecular models exported directly from VMD. Two of the examples include demonstrations of "hyperlinks" which activate pre-defined viewing/orientations for the molecules which assist readers with understanding of the 3-D structure of water and ice. The enhanced PDF includes 3-D models on the cover page, page 7, and page 22.Simple examples of VMD scenes converted to 3-D Adobe PDF files
These 3-D PDFs can be viewed on any platform supported by Adobe's free Acrobat Reader program. Other PDF reader programs may or may not be able to read and process the 3-D model information contained in the PDF file. Some programs will skip the 3-D model information and merely display an image of the 3-D model without the ability to interactively manipulate the model. You can test out your favorite PDF reader using the examples provided below.- 1UBQ - Ubiquitin in "Lines" representation
- 1UBQ - Ubiquitin in "CPK" representation
- 1UBQ - Ubiquitin in "Licorice" representation
- 1UBQ - Ubiquitin in "NewCartoon" representation
- 1UBQ - Ubiquitin in "Surf" representation
- 1UBQ - Ubiquitin in "MSMS" representation
Embedding 3-D PDF Models In PowerPoint Presentations
In addition to using 3-D models in PDF files, the models can also be embedded within PowerPoint presentations. In order to view the sample below, select "enable macros" when opening the presentation. From there, press F5 to view the presentation, and you'll be able to interact with the 3-D model while the presentation is displaying.- Sample presentation with embedded 3-D Ubiquitin model
- Adobe tutorial on embedding models in PowerPoint presentations
Creating your own 3-D PDF files with VMD and Adobe Acrobat3D
Presently, the only program we're aware of for creating 3-D PDF documents is Adobe Acrobat3D.
The easiest way to import VMD scenes into Acrobat3D is to use the Acrobat3D OpenGL capture utility which is built into Acrobat3D. Before capture can be initiated, some settings must be adjusted in Acrobat3D, and it must detect that VMD is available for capturing.
The first step in enabling Acrobat3D for capture is to open Acrobat3D, and initiate a capture. This is easily done using the File -> Create PDF -> From 3D Capture menu item. This will open the 3D Capture window, with the option of adjusting the capture settings or cancelling the capture altogether. If this is the first time that you've attempted to capture from VMD, then you'll need to startup VMD, click in the VMD OpenGL Display window with the mouse, and press the Print Screen key, which. At this point Acrobat's capture utility should ask if you want to enable capture from VMD (since it doesn't enable from all applications by default). Say yes, and then close VMD and Acrobat3D, and restart them again. Once capture has been enabled for VMD, you can proceed with the full sequence of capturing a VMD scene into Acrobat3D, as described below.
In order to successfully use the capture utility to import molecular graphics from VMD, the capture utility settings should be set as follows (use the Settings button on the 3D Capture window to view and edit the settings for VMD capture):
- Preset Name and Application
- This should show up automatically after the first time you enable capture from VMD.
- Enable 3D Capture for this application
- This must be enabled in order to capture from VMD
- General
- Discard stray points and lines: Off
- Discard textures: Off
- Group geometry by material: On
- Discard surface normals: Off
- Toggle y and Z axis: Off
- OpenGL
- Frame Buffer Mode: Clear Event
- View Transform Mode: First Matrix
- Capture Units: Unknown
Although the built-in Acrobat3D capture utility does well at grabbing the simplest forms of OpenGL 3-D geometry, VMD uses several advanced rendering features that confuse it. As of version 7.0.9 of Acrobat3D, it is necessary to tell VMD to use a very simple subset of OpenGL so that the Acrobat3D capture utility will work correctly. For VMD versions up to VMD 1.8.5, the only way to help Acrobat3D do it's job is to set a special VMDSIMPLEGRAPHICS envioronment variable, and limit your representations to the subset that Acrobat3D's capture utility can correctly interpret. For VMD 1.8.6 and presumably for later versions (until Adobe corrects the current limitations of the Acrobat3D capture utility), there is a new rendering mode designed to workaround the limitations of the Acrobat3D capture utility. This rendering mode is enabled with the Display -> Rendermode -> Acrobat3D menu item in the VMD main window.
Once the basic Acrobat3D capture settings have been adjusted for VMD, and VMD's rendering mode has been set for Acrobat3D capture, you may proceed with loading a molecular scene and capturing it from VMD.
We recommend using a small molecule such as 1UBQ for your first tests. Large models will take a long time for Acrobat3D to process, which is counter to the goal of making your first 3-D PDF quickly. Start with a simple molecule/system. Once you've become accustomed the conversion process you can proceed with more complex models. Capturing is performed by loading the molecular scene into VMD, and pressing the Print Screen key while Acrobat3D is awaiting a capture. Once the capture is initiated, you may see the VMD display blink briefly, followed by an Acrobat3D capture progress dialog window as it processes the VMD scene and prepares to convert the geometry to PDF.
When the capture has completed, you'll be presented with the Acrobat 3D Conversion window, which provides myriad options which control how the 3-D geometry captured from VMD is imported into the final PDF file. The best initial settings to work with until you get more familiar with the process are:
- General Tab
- Default background color: Black, gray, or white are good choices to start with
- Default lighting: CAD Optimized Lights
- Default rendering style: Solid
- Default animation style: Loop
- Add default views: Off
- The remaining General options can be left at their defaults.
- Import Tab
- Pass U3D file thorugh unchanged: On or Off, see below
- Enabling this option will allow very exacting replication of the original VMD scene, but will create a larger PDF file, and older computers may have trouble viewing it.
- Disablig this option will let you to use controls in the remaining tabs to request Acrobat3D to reduce the geometric detail of the molecular scene in an attempt to make the resulting PDF document more compact, and to make it less challenging to display on old or otherwise underpowered computers.
- Other tabs
- The various other import tabs contain options for simplifying the imported 3-D models, reducing detail, and changing the coordinate system of the data. These options are described in the Acrobat3D help and probably don't need to be adjusted at all until you've become accustomed to using Acrobat3D and are starting to import larger or more complex VMD molecular scenes into your PDF documents.
Advanced Topics
Beyond simply inserting static structures into a PDF file, Acrobat3D also supports various types of simple animations, changing of colors, views, cross sections, and many other capabilities. To get an introduction to the types of interactive capabilities possible within a 3-D PDF file, have a look at this Concept Car Customization Prototype, which allows the viewer to customize a car's options and coloring, with multiple 3-D views, all within the a standard PDF viewer. Adobe provides numerous tutorials for these advanced features on the Acrobat3D home page. Additionally, there are more tutorials on scripting, animation, and other advanced 3-D PDF topics at the Acrobat User Community web site. The Javascript for Acrobat3D page contains many example files and reference documents which will be of great interest to anyone developing sophisticated 3-D PDF files.