


Next: MDFF with explicit solvent
Up: MDFF Tutorial
Previous: Overview of MDFF commands
Contents
Subsections
A simple MDFF example
In a typical MDFF application, a high-resolution atomic structure of a
macromolecule is flexibly fitted into a low-resolution density map of
the same macromolecule imaged in a different conformation. As a first
example, however, we will make use of two atomic structures representing
different conformations of the protein adenylate kinase. The PDB file
1ake-initial.pdb will provide the initial structure, and a target
density map will be generated from the PDB file 4ake-target.pdb.
You will then flexibly fit the initial structure into the target density
map using MDFF. You can compare the two structures by loading the PDB
files in VMD (Fig. 2).
Figure 2:
Initial and target structures shown
in red and blue, respectively.
![\begin{figure}\begin{center}
\par
\par
\latex{
\includegraphics[scale=0.5]{FIGS/adk-initial-and-target}
}
\end{center}
\end{figure}](img6.gif) |
Generating a simulated density map
You will first generate a noise-free, simulated electron microscopy map
from the PDB file 4ake-target.pdb.
- 1
- In the VMD Tk Console, load the target PDB file by
typing:
- 2
- To make sure the target structure is complete, we will use the
VMD plugin AutoPSF, which automates building structures for
molecular dynamics simulations. In the VMD Main window, choose Extensions
 Modeling
Automatic PSF Builder
(Fig. 3).
Modeling
Automatic PSF Builder
(Fig. 3).
Figure 3:
The VMD AutoPSF window.
![\begin{figure}\begin{center}
\par
\par
\latex{
\includegraphics[scale=0.5]{FIGS/autopsf}
}
\end{center}
\end{figure}](img7.gif) |
- 3
- Click on Load input files to load the topology
information from the CHARMM force field. Then click on Guess
and split chains using current selections, and finally click on
Create chains. Hit OK in the two information boxes
that will appear. The files generated by AutoPSF
(4ake-target_autopsf.psf and 4ake-target_autopsf.pdb) will be
automatically loaded in VMD as the top molecule.
Note that in some other cases, patches may need to be added as identified in
the Step 4 box. In such cases, click Apply patches and finish PSF/PDB
to add the patches and new PSF/PDB files will be generated and loaded.
- 4
- Generate a simulated map using the mdff sim command.
First, type mdff sim to get the usage information.
- 5
- The usage information shows that mdff sim requires an atom
selection, which can be created using the atomselect command:
| set sel [atomselect top all] |
|
- 6
- The variable sel now contains a selection of all the
atoms from the top molecule, which is usually the last molecule we loaded in
VMD. To generate a simulated map with a resolution of 5Å in, e.g., the
dx file format, type:
| mdff sim $sel -res 5 -o 4ake-target_autopsf.dx |
|
- 7
- Load the simulated map in VMD by typing
| mol new 4ake-target_autopsf.dx |
|
You can change the appearance of the
density map using the Graphics
Graphical
Representations window. For example, choose Wireframe instead of Points
for rendering the volume. You can choose the
contour level by sliding the Isovalue bar. Fig. 4 shows
both the target structure and the simulated map.
Figure 4:
Target structure and simulated map shown in
cartoon and mesh, respectively.
![\begin{figure}\begin{center}
\par
\par
\latex{
\includegraphics[scale=0.7]{FIGS/adk-simmap}
}
\end{center}
\end{figure}](img8.gif) |
Now that you have a density map, you need to convert it to the
potential
 used by MDFF, where
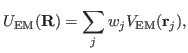 |
(1) |
and
 |
(2) |
Here,  denotes the values of the density map at each grid point. The
threshold value
denotes the values of the density map at each grid point. The
threshold value
 is used for flattening the solvent density
by clamping density values below the threshold. By default, MDFF uses
is used for flattening the solvent density
by clamping density values below the threshold. By default, MDFF uses
 , which is usually where the solvent peak lies in cryo-EM
maps. In this example using a simulated map, however, there is no
solvent contribution to the density. The scaling factors
, which is usually where the solvent peak lies in cryo-EM
maps. In this example using a simulated map, however, there is no
solvent contribution to the density. The scaling factors  and
and  will be discussed in Sections 2.4 and 2.6,
respectively.
will be discussed in Sections 2.4 and 2.6,
respectively.
MDFF takes advantage of the NAMD's gridForces feature, through
which an arbitrary external potential defined on a 3-D grid can be added
to a molecular dynamics simulation (D. Wells, V. Abramkina, and A.
Aksimentiev, J. Chem. Phys., 127:125101-125110, 2007).
NAMD's gridForces feature requires an input 3-D map defining the
external potential in the DX file format.
- 1
- To obtain a 3-D map defining
 , which will be
provided to NAMD, you need to use the command mdff griddx. The
scaling factor
will be provided to NAMD separately, so the same DX
map can be used with different scaling factors
. To obtain the
usage information, simply type mdff griddx.
, which will be
provided to NAMD, you need to use the command mdff griddx. The
scaling factor
will be provided to NAMD separately, so the same DX
map can be used with different scaling factors
. To obtain the
usage information, simply type mdff griddx.
- 2
- Run the following command to generate the DX file defining
:
| mdff griddx -i 4ake-target_autopsf.dx -o |
|
| 4ake-target_autopsf-grid.dx |
|
Rigid-body docking the structure into the density map
Prior to performing flexible fitting of the atomic structure into the
density map, it is necessary to perform a rigid-body docking.
There are a few software packages that provide this functionality. Here
we will use the voltool fit command in VMD.
- 1
- Run the following commands in VMD's TkConsole:
| mol new 1ake-initial.pdb |
|
| set sel [atomselect top "protein and noh"] |
|
| voltool fit $sel -res 5 -i 4ake-target_autopsf.dx |
|
- 2
- After the rigid body fitting is complete, the selected
atoms should be docked inside the density map. To save this structure, type the following command:
$sel writepdb 1ake-initial-docked.pdb
Preparing the initial structure
Now we turn to the preparation of the input structure. The steps
required for setting up a regular molecular dynamics simulation are also
required by MDFF.
- 1
- Load the initial docked structure in VMD by typing:
| mol new 1ake-initial-docked.pdb |
|
- 2
- In order to complete the structure and generate a PSF file
contaning all the connectivity information and partial atomic charges
required by NAMD, use again the AutoPSF plugin as in
Section 2.1. If you are working on the same VMD session
from the beginning of the tutorial, make sure you click the Reset AutoPSF button and the choose the correct molecule in the AutoPSF plugin. You should be able to generate the files 1ake-initial-docked_autopsf.psf and 1ake-initial-docked_autopsf.pdb.
- 3
- You now need to generate a PDB file containing the per-atom
scaling factors
in Equation 1, which are set to the
atomic mass by the mdff gridpdb command. As usual, check the usage
by typing mdff gridpdb with no arguments.
- 4
- Now run the command
| mdff gridpdb -psf 1ake-initial-docked_autopsf.psf |
|
| -pdb 1ake-initial-docked_autopsf.pdb -o 1ake-initial-docked_autopsf-grid.pdb |
|
We will apply restraints during the MDFF simulation to enforce the
secondary structure of our protein. NAMD's extraBonds feature
allows for additional bonds, angles, dihedral angles, and impropers to be
defined. The VMD plugin ssrestraints automates the generation
of extraBonds input files that define secondary structure
restraints.
- 1
- Type ssrestraints to check the usage information.
- 2
- Define restraints for
 and
and  dihedral angles for
amino acid residues in helices or sheets, as well as restraints for
hydrogen bonds involving backbone atoms from the same residues:
dihedral angles for
amino acid residues in helices or sheets, as well as restraints for
hydrogen bonds involving backbone atoms from the same residues:
| ssrestraints -psf 1ake-initial_autopsf.psf |
|
| -pdb 1ake-initial-docked_autopsf.pdb -o 1ake-extrabonds.txt -hbonds |
|
MDFF may result in relatively large forces being applied to
certain atoms, which could in turn lead to certain structural artifacts
such as chiral centers with wrong handedness or generation of cis
peptide bonds. This is a limitation of any modeling technique based on
commonly used molecular dynamics force fields that do not define explicit
terms to prevent such structures. VMD provides two plugins to detect,
fix, and prevent generation of cis peptide bonds and chirality errors.
Please refer to the Structure Check tutorial for more details.
- 3
- Here we will simply restrain peptide bonds to their current
cis/trans configuration, as well as all chiral centers to their current
handedness. First, make sure the initial structure generated by AutoPSF
is loaded as the top molecule in VMD. If not, you can load it by running:
| mol new 1ake-initial-docked_autopsf.psf |
|
| mol addfile 1ake-initial-docked_autopsf.pdb |
|
- 4
- Use the cispeptide plugin to restrain cis peptide bonds to their
current cis/trans configuration:
| cispeptide restrain -o 1ake-extrabonds-cispeptide.txt |
|
- 5
- Analogously, use the chirality plugin to restrain chiral centers
to their current handedness:
| chirality restrain -o 1ake-extrabonds-chirality.txt |
|
Running the MDFF simulation with NAMD
As mentioned above, MDFF simulations are performed with the program
NAMD, which we assume you have installed in your system.
- 1
- You must first generate a NAMD configuration file. This is
automated by the MDFF plugin in VMD. In the VMD Tk Console
window, type mdff setup for usage information.
- 2
- Generate a NAMD configuration file using the command:
| mdff setup -o adk -psf 1ake-initial-docked_autopsf.psf |
|
| -pdb 1ake-initial-docked_autopsf.pdb |
|
| -griddx 4ake-target_autopsf-grid.dx |
|
| -gridpdb 1ake-initial-docked_autopsf-grid.pdb |
|
| -extrab {1ake-extrabonds.txt
1ake-extrabonds-cispeptide.txt |
|
| 1ake-extrabonds-chirality.txt} -gscale 0.3 -numsteps 50000 |
|
Most options above specify the names of files you generated in
previous steps and should be self-explanatory. The option -gscale defines the scaling factor
in Equation 1.
In the interest of time, we chose to run for only 50ps
(-numsteps option). Real MDFF applications will typically
require longer simulations to reach convergence. You will learn how to
judge convergence of an MDFF simulation in Sections 2.8 and
2.9.
- 3
- Generate a second NAMD configuration file in which only energy
minimization will be performed with a much higher scaling factor
:
| mdff setup -o adk -psf 1ake-initial-docked_autopsf.psf |
|
| -pdb 1ake-initial-docked_autopsf.pdb |
|
| -griddx 4ake-target_autopsf-grid.dx |
|
| -gridpdb 1ake-initial_autopsf-grid.pdb |
|
| -extrab {1ake-extrabonds.txt
1ake-extrabonds-cispeptide.txt |
|
| 1ake-extrabonds-chirality.txt} -gscale 10 -minsteps 2000 |
|
| -numsteps 0 -step 2 |
|
- 4
- Quit VMD.
- 5
- Run NAMD using the configuration file generated by VMD, i.e.,
run the following commands in a terminal:
| namd2 adk-step1.namd > adk-step1.log |
|
| namd2 adk-step2.namd > adk-step2.log |
|
This step should take about 35 minutes on a single processor. If you
don't want to wait, you can proceed to the next step and use the
provided trajectory files, as explained in the next section.
You can also improve the speed of the simulation by using more processors
by passing namd2 the +p$ option, where $ is the number of processors you wish to use.
REMARK: The optimal choice of the scaling factor
, i.e. the gscale parameter, depends on the system to be fitted and the map. The higher the value, the stronger the forces will be acted on the system to fit the map.
In general a gscale of 0.3 works fine for step 1 but for step 2, the minimization step, it is advised to test a few different gscale, such as 1, 5 and 10 and choose the one that works best for your map and system.
The resulting trajectories will be saved to files adk-step1.dcd
and adk-step2.dcd. If you want to continue working through the
tutorial before the simulations are completed, you can use the provided
trajectory files adk-step1-result.dcd and adk-step2-result.dcd instead. Please note that, due to the stochastic
nature of molecular dynamics simulations, it is expected that the
trajectories obtained will differ from the ones provided. You will now
load the trajectory files in VMD and visualize the MDFF results.
- 1
- Start a new VMD session and load the target structure (for
reference) by typing the following commands on the Tk Console:
| mol new 4ake-target_autopsf.psf |
|
| mol addfile 4ake-target_autopsf.pdb |
|
- 2
- Open the Graphical Representations window available under
Graphics
Representations and change the Drawing
Method to NewCartoon. Change also the Coloring Method to ColorID 0 blue.
- 3
- Open the Color Controls window available under Graphics
Colors. Change the background color to white by
clicking on Display, Background, and finally 8
white.
- 4
- Load the initial structure by typing the following commands on
the Tk Console:
| mol new 1ake-initial-docked_autopsf.psf |
|
| mol addfile 1ake-initial-docked_autopsf.pdb |
|
- 5
- Following the same steps as above, change the representation to
NewCartoon and the color to red.
Your VMD OpenGL Display should look similar to
Fig. 2.
- 6
- Load the MDFF trajectories using the following commands:
| mol addfile adk-step1.dcd |
|
| mol addfile adk-step2.dcd |
|
- 7
- You can navigate through the trajectory using the VMD
Main window. For example, you can drag the trajectory slider to jump to
any frame in the trajectory.
Calculating the root mean square deviation
The easiest way to track the evolution of the MDFF simulation and track
its convergence is by plotting the root mean square deviation (RMSD)
over time. There are different interfaces for RMSD calculation in VMD.
For example, the mdff check command can be used to take a quick
look at the RMSD evolution of the simulated system.
- 1
- Type mdff check on the Tk Console window for usage
information.
- 2
- Plot the backbone RMSD with respect to the initial structure for
each trajectory frame using the command
A window similar to the one depicted in Fig. 5 should
appear. Note how the RMSD levels off toward the end of the simulation.
Figure 5:
Backbone RMSD with respect to the initial structure for the MDFF simulation.
![\begin{figure}\begin{center}
\par
\par
\latex{
\includegraphics[scale=0.5]{FIGS/adk-vacuo-rmsd}
}
\end{center}
\end{figure}](img20.gif) |
- 3
- Now plot the backbone RMSD with respect to the target structure
using the command
| mdff check -rmsd -refpdb 4ake-target_autopsf.pdb |
|
A window similar to the one depicted in Fig. 6
should now appear. Note how the RMSD decreases (the fitting improves)
in the last couple of frames, which correspond to the energy
minimization performed in the MDFF step 2.
Figure 6:
Backbone RMSD with respect to the target structure for the MDFF simulation.
![\begin{figure}\begin{center}
\par
\par
\latex{
\includegraphics[scale=0.5]{FIGS/adk-vacuo-rmsd-target}
}
\end{center}
\end{figure}](img21.gif) |
- 4
- Now let's see how you can use Tcl commands to calculate RMSDs.
You will first create atom selections for both the initial and the
target structures. If you followed the previous steps exactly the target
structure should be loaded as molecule 0, whereas the initial structure and
MDFF trajectory should be loaded as molecule 1. Type the following
commands:
| set selbbref [atomselect 0 "backbone"] |
|
| set selbb [atomselect 1 "backbone"] |
|
- 5
- Make sure the atom selection selbb points to the initial
frame loaded, which is the initial structure:
- 6
- Now calculate the RMSD between selbb and selbbref:
| measure rmsd $selbb $selbbref |
|
You should get an RMSD of 7.89Å.
- 7
- Now make the atom selection selbb point to the last frame of the trajectory and recalculate the RMSD:
| $selbb frame last |
|
| measure rmsd $selbb $selbbref |
|
If you used the provided trajectory files, you should get an RMSD of
0.49Å. The RMSD value will naturally vary if you load a different MDFF
trajectory.
Calculating the cross-correlation coefficient
Now you will calculate the cross-correlation coefficient (CCC) between
the target density map and each frame of the MDFF trajectory.
Internally, a simulated map is created from the atomic structure and the
cross-correlation coefficient between the two maps is calculated.
- 1
- Plot the CCC between each MDFF trajectory frame and the target
map using the command
| mdff check -ccc -map 4ake-target_autopsf.dx -res 5 |
|
A window similar to the one depicted in
Fig. 7 should appear. Note how the CCC follows
the same trend as the RMSD previously inspected.
Figure 7:
Cross-correlation coefficient between target density map and each frame of the MDFF simulation.
![\begin{figure}\begin{center}
\par
\par
\latex{
\includegraphics[scale=0.5]{FIGS/adk-vacuo-ccc}
}
\end{center}
\end{figure}](img22.gif) |
- 2
- The command mdff ccc can be used to calculate the CCC
between an atom selection and a density map. First, create atom
selections containing all the atoms, similarly to when you calculated
RMSDs:
| set selallref [atomselect 0 "all"] |
|
| set selall [atomselect 1 "all"] |
|
- 3
- Type mdff ccc to obtain the usage information.
- 4
- Calculate the initial CCC:
| $selall frame 0 |
|
| mdff ccc $selall -i 4ake-target_autopsf.dx -res 5 |
|
You should get a CCC of 0.671.
- 5
- Now calculate the final CCC:
| $selall frame last |
|
| mdff ccc $selall -i 4ake-target_autopsf.dx -res 5 |
|
If you used the provided trajectory files, you should get a CCC of
0.991.
- 6
- Quit VMD.
Next: MDFF with explicit solvent
Up: MDFF Tutorial
Previous: Overview of MDFF commands
Contents
school@ks.uiuc.edu